Showing posts with label indie. Show all posts

Sunday, September 16, 2012

Handmade Realistic Butterflies


Sorry about the finger smudges 

I revamped this shadow box for a sort of curiosity cabinet vibe in my apartment. I basically printed stock images of butterflies from DeviantArt onto regular printer paper and then cut them out. Then I painted some clear fishing line with black nail polish and hot glued them to the butterflies. Lastly, I pinned the butterflies to the shadow box.

Sunday, September 9, 2012

Monday, August 13, 2012

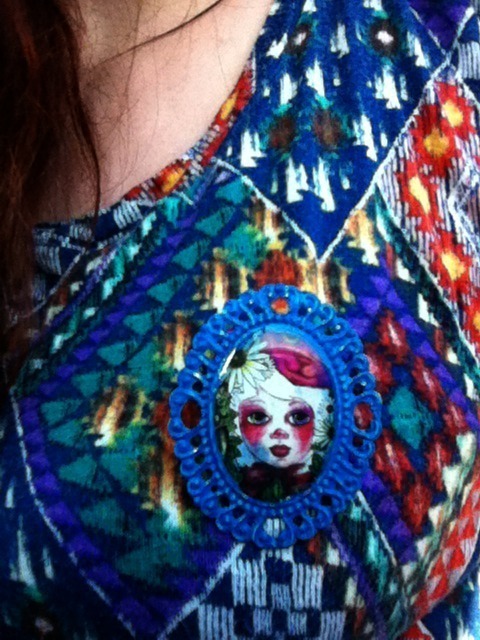
How to: Faux Cabochons

Introduction:

This tutorial is just an easier way to create faux cabochons for your future jewelry projects. Purchasing glass cabochons in my opinion, is not only expensive at times, but a little nauseating when purchasing the wrong size online. 

 Using Casting Epoxy Resin You Can: seal your images for eternity, use this for any size setting, and create jewelry pieces in bulk inexpensively!

What you will need:

  • Jewelry setting (I use a variety, but for this tutorial I used plastic cameo settings found on Etsy here.)
  • Casting Resin (I used Easy Cast Clear Casting Epoxy.)
  • Mod Podge
  • Exacto Knife
  • Small Paint Brush
  • Scissors
  • An Image

Step One.
The first step is to find an image, size it down, and print it. (On most printers you can easily do this in the Printer Settings >Page Setup.) Or you could paint directly onto the cameo!!! :) So many possibilities...
I used an image of one of my artworks.

Step Two.
Print your image. Cut it out with your scissors. But do not size down entirely just yet...

Step Three.
Instead of guessing what size you need to cut your image, start off by painting the middle of the cameo with a thin THIN layer of Mod Podge.


Step Four.
Now place your image over the cameo and FIRMLY push down on your image...

I enjoy odd compositions so I decided to focus on this part the piece.

As your press down the Mod Podge keeps the image in place and creates a visible outline where the center of the cameo will be. This outline will act as an easy guide to show you where you need to cut with your exacto knife.

Now proceed to cutting around your image. Carefully tearing the excess paper away from the cameo.


Step Five.
This is the most important part of the project. 
If you skip it, the printer ink will bleed and ruin the whole brooch.
After you have carefully extracted the excess paper from the cameo, your next step will be to seal it start sealing your image.

  • With your CLEAR ACRYLIC SPRAY PAINT, spray your cameo LIGHTLY from at least one foot away from the cameo. Do not use it at close range or continuously spray it. This will cause the ink to bleed. Let it dry. Then Spray again.


  • After the clear acrylic spray paint has completely dried. Use a small paint brush and paint a THIN layer of Mod Podge over your image. Wait for the Mod Podge to completely dry, then repeat the process again.


Step Six.
Wait for the cameo to completely dry before moving onto the next step.

Step Seven.
Now it is time to seal the cameo forever with EASY CAST CLEAR CASTING EPOXY.
Measure out both equal parts of the resin and hardener. I used less than a teaspoon for both.
MIX WELL.
If you mix this stuff really good, it will help eliminate bubbles that arise during the chemical process.


Step Eight.
Pour the resin onto your image.
WATCH YOUR RESIN.
It should spread out by itself slowly, so make sure you do not use a lot or it could seep out of the middle and onto the framed areas. 

Step Nine.
If the resin is set correctly it should look like it is slightly bulging outward, convex.
During this time bubbles will rise to the top and pop, nothing to fret over in the beginning.
It usually takes 24 hours to cure so now it is time for the waiting game.


Fin.
After the resin has cured YOU ARE FINALLY FINISHED!!!
Now you can wear any piece of art!!!


Misc. Examples:


Saturday, July 9, 2011

Pinback Buttons


Pinback buttons. www.shaylafish.etsy.com

Gosh guys...I really haven't been blogging as much as I'd like to....and I miss everyone.
I have been super Super SUPERRRRRRRRR busy...no time to do the things I want to do. 

I recently started on a new belt. I love studded belts but I'd rather make my own with different designs. This one I am using a kitsch fabric with purple pyramid studs. It is a hard, long, annoying, and painful process;but when the belt is finished and I wear it out in public, everyone asks me where I bought it. I have the joy of telling them that I made it myself! :)

Sunday, July 3, 2011

You Can Never Have Too Many Brooches

Handmade Brooch

Wooden Lace Brooch featuring "A Beetle in Her Hair"

I love collecting brooches...but making my own is a whole other story. This brooch is made from wood with one of my drawings transferred to it surrounded by lace. I have grown very fond of this and decided to put one up on Etsy for someone else to adore.

Hope everyone is having a lovely summer! The heat here is exhausting me!

Wednesday, June 22, 2011

Pink Hair


I recently discovered a program that is so much fun to use with a tablet. The program is called "Paint Tool SAI." It is easy to utilize and is equipped with different mediums to play around with. Creating this little girl was a fun experience with this program and I will definitely be using it a lot from now on.


Thursday, May 19, 2011

Illustrated Plush Stickers

I think I may have blogged about this drawing before. Hmmm...anyways....
Illustrated Plush Stickers set of five

These are my new stickers!!! (I am going sort of sticker crazy lately)

These little stuffed animals are adorable! I am selling them as a set of five for $3.00. 
You can view them here.

XOXO

Monday, May 16, 2011

Queen of Rabbits

Yeah, I really like to think of myself as the queen of rabbits. :)


Queen of Rabbits Sticker

Of course, she is also a sticker HERE.

Friday, May 13, 2011

"The Lovelies" sticker pack


Introducing "The Lovelies"
The Lovelies are a group of four girls who are a bit conniving but by all means fashionable. These illustrated stickers are approximately 2.5 inches in width, the length differs with each sticker due to their hairstyles. Complete with a "matte" finish these stickers would be perfect for anyone interested in illustration, fashion, scrap booking, and more!


The Lovelies Sticker Pack set of four


View them here


Bad news, my son has destroyed my laptop. Along with the missing keys it now has lines going through the screen and I need to get a new computer for school before next Fall. Saving all of my Etsy sales in hopes that I can achieve my goal.

Friday, April 22, 2011

Earth Day


For an assignment we had to do an "Earth Day" themed project. 
This is one of my concept ideas I made in class...sort of a Mother Earth-y kind of thing going on. 

I decided to redo this and add more flowers, change her position, color palette, and paint it in oils. 

Tuesday, October 12, 2010

Handmade Belt

For a long time I have been really obsessed with belts, especially those with pyramid studs. I have fed this obsession by buying belt after belt after belt after belt, even though they all looked the same I still bought them. Now that I have so many I can't find any interesting ones that would be worth getting because I basically already have them all. I wanted a floral one and I kept googling and I could never find one. So I though about just making one in hopes I would figure it out.

First off I drew up what I wanted because I work well when I have a visual of something first.

Then I shopped around at Hobby Lobby for the most desirable fabric to use and I was excited when I found what I wanted. I ordered a few belts off the internet because even with shipping, it is still a hell of a lot cheaper than a store bought belt. I even bought the pyramid studs off the internet, because just as I had imagined, the studs in the belt that I bought were of shitty plastic.

Getting rid of the crappy plastic studs

I spray painted the metal studs I had bought, I used two different colors to achieve the vintage, old-feel I was going for. I was really thrilled when they came out exactly how I wanted them too.


Putting fabric on and sewing it to the belt was the easy part, re-assembling all the parts I took out of it was the first hard part I had went though. I had to figure out how to actually get things to stay and be permanent so they wouldn't fall out later on.

Putting the metal studs in the old holes of the belt was the hardest part and actually took a long time, it is too hard to get the studs to stay straight and fit exactly right.

I am satisfied that my first belt turned out the way it did, I hope to make a lot of improvements on my next one.


The next one I am making is a rabbit belt. It is kind of wonderland inspired I suppose, I will post it as soon as I am done. I'm currently figuring out how to make a lot of different things that I can not find on the internet or anywhere else.

I have entered an art show literally called Recycled Art Show. I plan on entering a 2-d project. My idea is just making a collage using paper bags, but I will be using paint over them...just so I can have something actually recycled being used in my work.

Plastic bags are ruining our environment, I literally fucking hate them. If you want you can search anything about plastic bags and find all sorts of negative results.

I have drawn up what I want my collage to be of, and I have taken an approach toward Ocean Wildlife as a result from watching The Cove in my English class. I hope to have a very controversial piece in the show because I plan on making it a bit on the gore side.

Saturday, August 28, 2010

How to Draw a Peacock Feather


I am currently studying art education. Therefore, I made this tutorial as practice for myself in teaching others how to draw.
I hope as an artist you will be able to gain a bit from this tutorial. I've always had trouble with drawing feathers in art, most specifically of peacocks.

First, I suggest finding a stock image to look at. It is always better to keep looking at the subject rather than guessing from memory. (here is a good image)

Materials You Will Need: Paper, Tortillion (shader), and a pencil


The Steps: 
1. Draw a very simplified balloon (see left image below)

2. Inside the actual balloon area create oval/circular designs similar to the design on a peacock's feather. The stock photo makes this part handy because every feather creates a different unique design.

Steps 1 and 2

3. Lightly color in the main part of the eye:(your area inside the balloon shape but outside of the ovals)

4. I made the main area of the eye on mine darker before blending.

5. If you have a shader you can use that to blend it all together, if not you can smudge with your finger. I blended all around the main area of my eye leaving some light around my small oval shapes. 

6. Make the smallest part of the eye the darkest. Also leaving a bit of light inside it to give it a shiny, reflective feel.

7. Lightly color in the rest of the eye and blend for a desirable effect. Blend again.

8. The feathers appear more spaced out at the bottom and closer together as you make your way to the top. You can use the letter V as a layout for the feather.

9. To add feathers above the eye I actually go through the eye with my pencil from underneath it to try and keep some symmetry. Then I blend whatever lines noticeable inside the eye so they aren't visible anymore.

10. After the basic line art add a little more graphite to those feathers to make them thicker. (last  photo on right)

steps 8-10

Last step:
This is my final feather. I added more shading inside the eye and left more lighter to resemble light bouncing off the feather. You can really add to your piece and make it "pop."


I really hope you enjoyed this little tutorial and I plan on adding more soon. :)